Christmas Chalet Ornament
It travels flat in its envelope. Ten parts snap together — no glue, no tools — in about five minutes.
In the envelope
- —The snowy base
- —The front gable, with your name on the sign
- —The back gable, with the year
- —Two side walls
- —The ridge cap, with the hanging ring
- —Two roof panels
- —The Christmas tree and the snowman
- —Natural twine to hang it, and the LED tea light if you chose that option.
Put it together
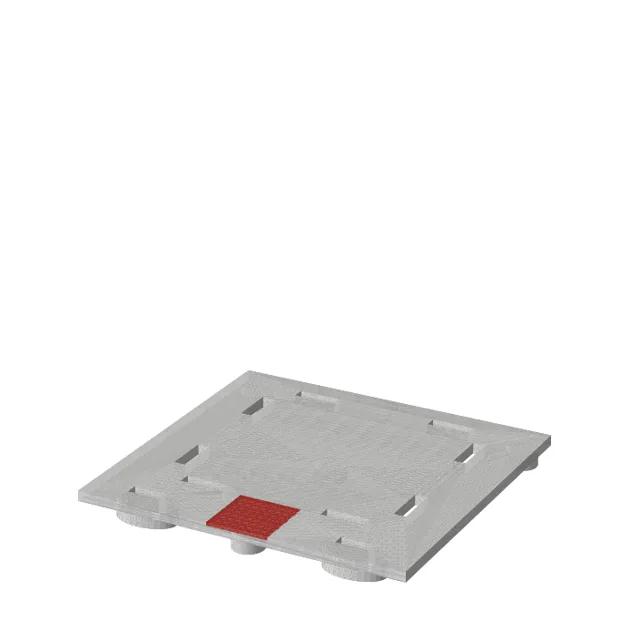
1. Lay the base flat
Put the base on the table, the little red doormat toward you. Its slots tell you where every wall goes.
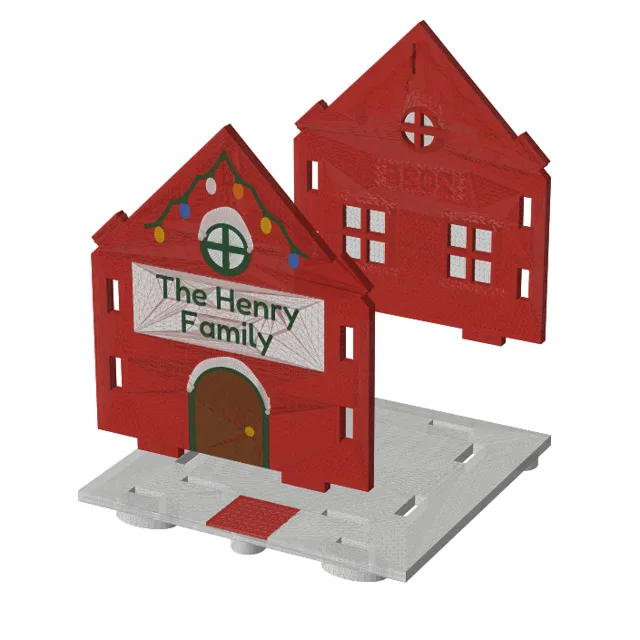
2. Stand the two gables
The front gable (your name) goes into the two front slots, its door right above the doormat. The back gable (the year) goes into the two back slots. Press each one down until it sits flat on the base.
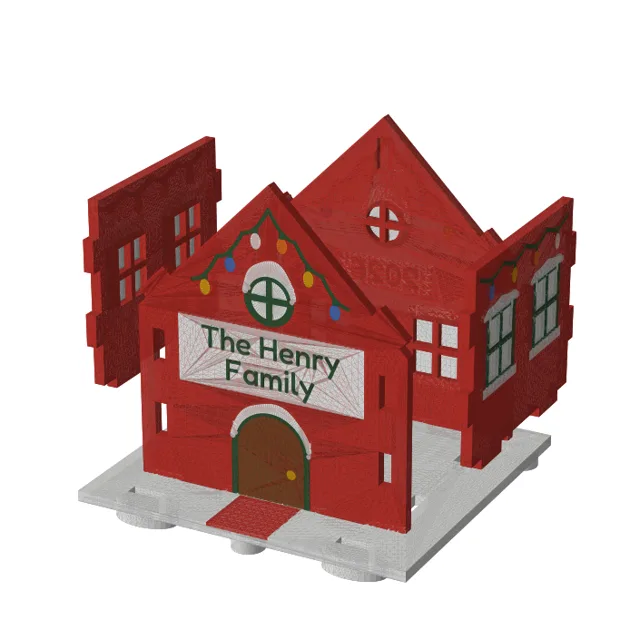
3. Slide in the side walls
Lower each side wall between the gables: the tabs on its ends go into the slots on the gables' edges, the tabs underneath go into the base. Slide it straight down, it is a snug fit on purpose.
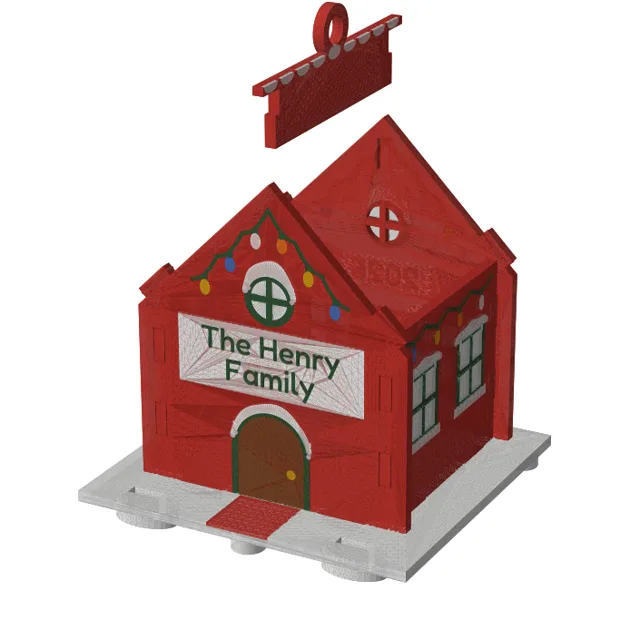
4. Drop in the ridge cap
Ring on top, lower the ridge cap between the two peaks: its two little tongues drop into the pockets inside the gables. It sits loose for now, the roof locks it.
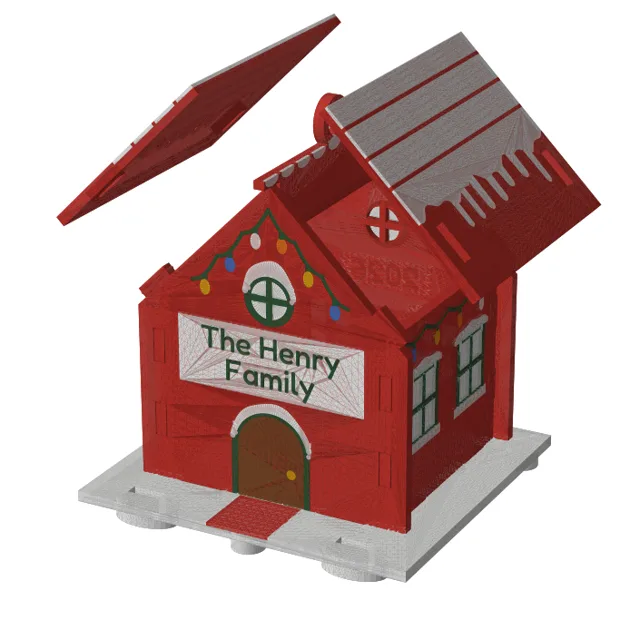
5. Press on the roof
The gables have tabs sticking up at the top: thread them through the slots of a roof panel and press down near the slots until it clicks. Then the other panel. This is the tightest step — push firmly by the slots, never in the middle of the panel.
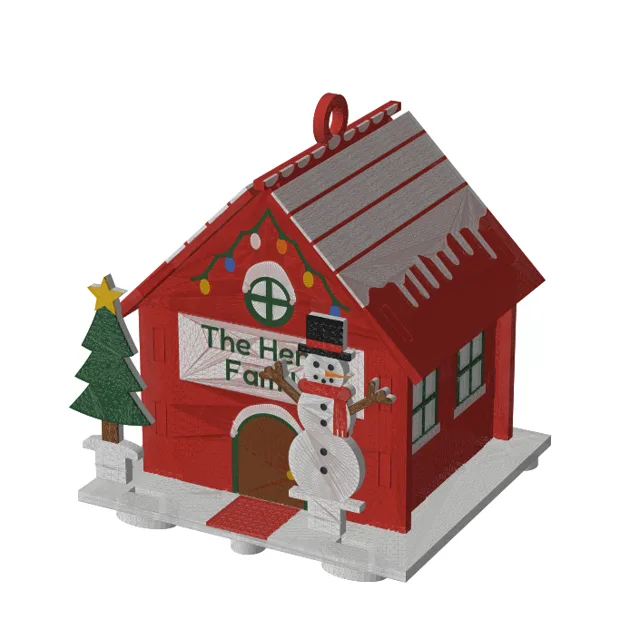
6. Plant the tree and the snowman
The tree on the left, the snowman on the right: push their tabs into the two small slots at the front of the base.
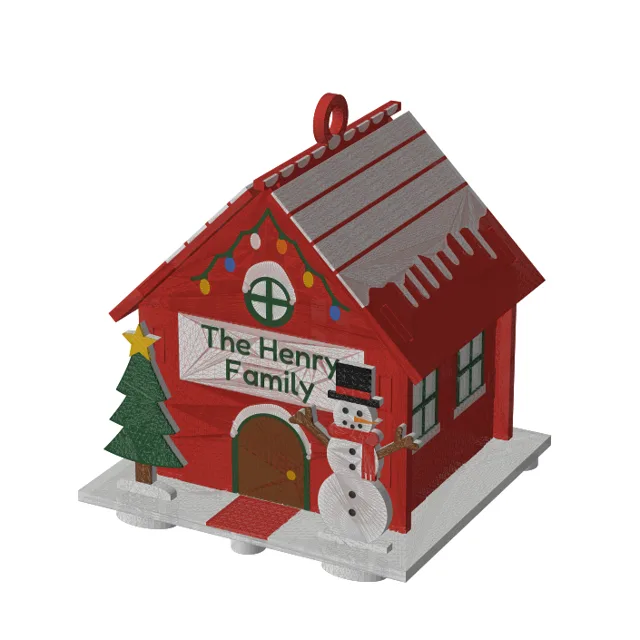
Light it up
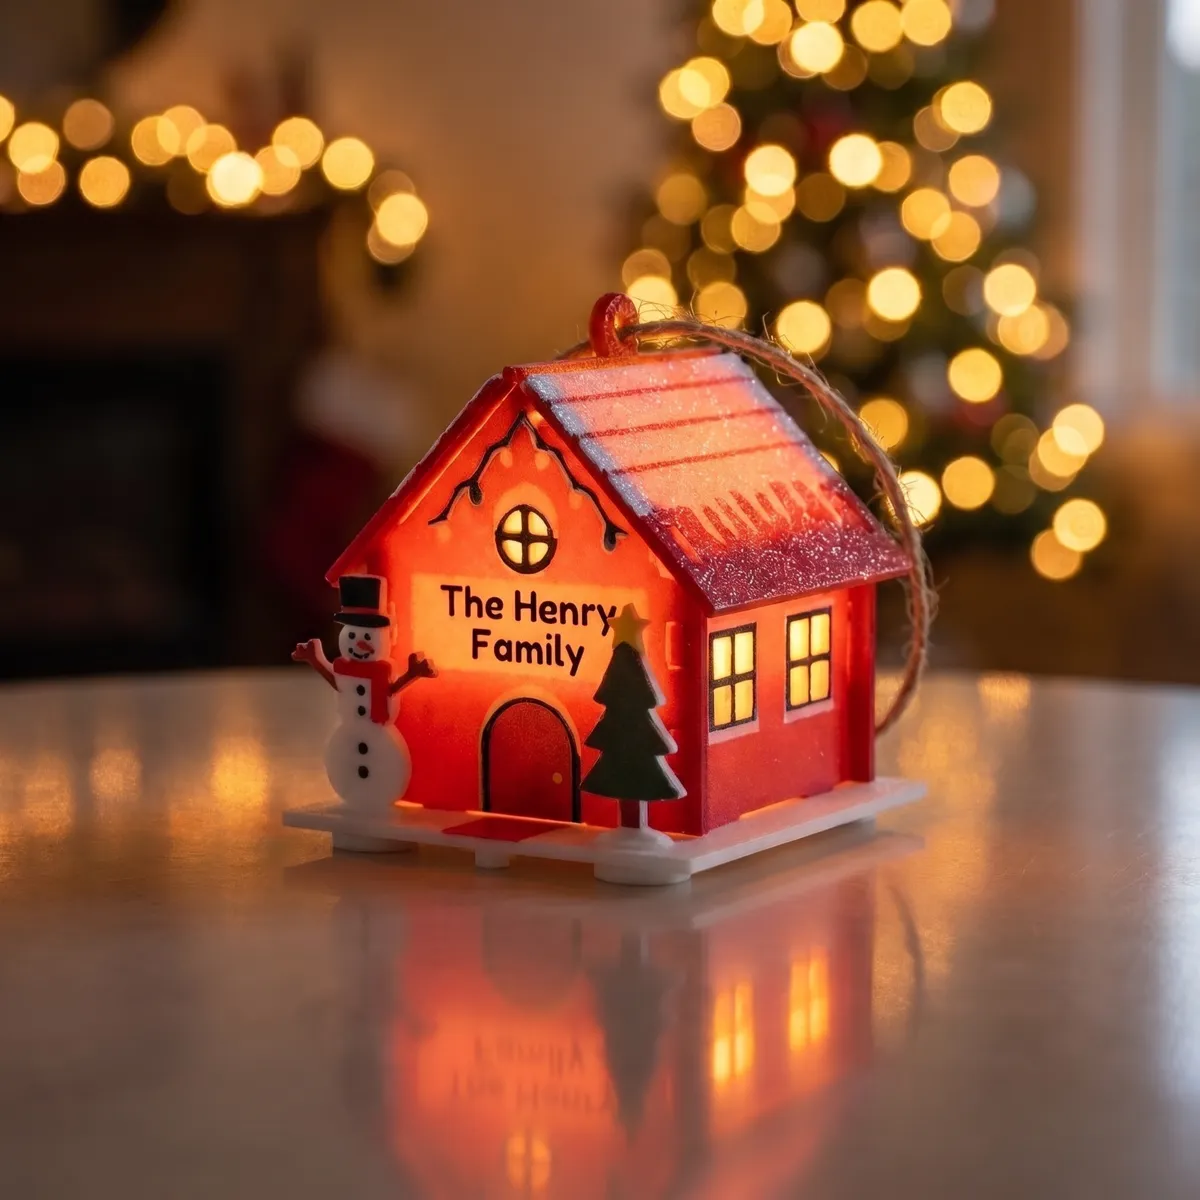
Lift one roof panel straight up by its slots, drop a standard 38 mm (1.5 in) LED tea light inside, switch it on and press the panel back. The windows have thin white panes, so they glow instead of showing the light.
LED only, never a real flame
The chalet is 3D printed in PLA, which softens with heat. A candle inside would melt it.
Looking after it
- —Dust it with a dry, soft brush. Never put it in the dishwasher.
- —Indoor decoration: keep it away from radiators and full sun behind a window.
- —To store it after the holidays, take it apart in the reverse order and slip the flat parts back in the envelope.